How to Create LAMP stack with Laravel on Digital Ocean Server
Saquib Rizwan wrote a nice tutorial on how to create LAMP stack with Laravel on Digital Ocean Server.

Laravel has become the PHP framework of choice for projects of all scopes. From a simple web app to huge corporate portals, laravel is up for tasks of all scopes. The robust framework is very versatile and is supported by a very passionate community of developers and users. One good thing about Laravel is the fact that it is easy to install and is compatible with all development environments except one exception; the installation of Laravel framework on cloud servers.
In this tutorial, I will take you through the steps required to setup a Laravel powered LAMP stack on Ubuntu. For the purpose of this tutorial, I will be using DigitalOcean (DO) cloud server running Ubuntu 16.04.2.
Connect to DO Cloud Server
The most common and convenient way of connecting to cloud servers is through Secure Shell (SSH). This shell offers a secure and safe communication channel for connecting to and executing commands on the cloud server.
SSH comes pre built in Linux environments. For MS Windows, you can use PuTTY to enable them. To connect to the cloud server, you must have the following credentials:
- Server IP address
- Username
- Password or SSH key
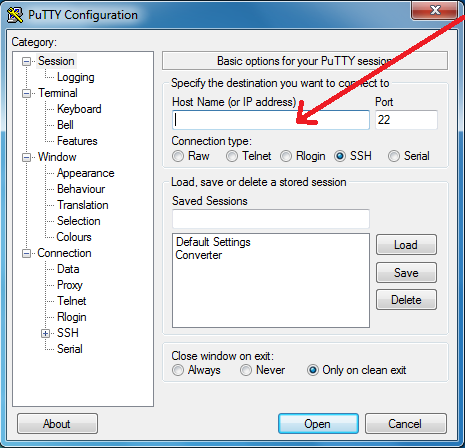
Fire up PuTTY and fill in the server IP address.
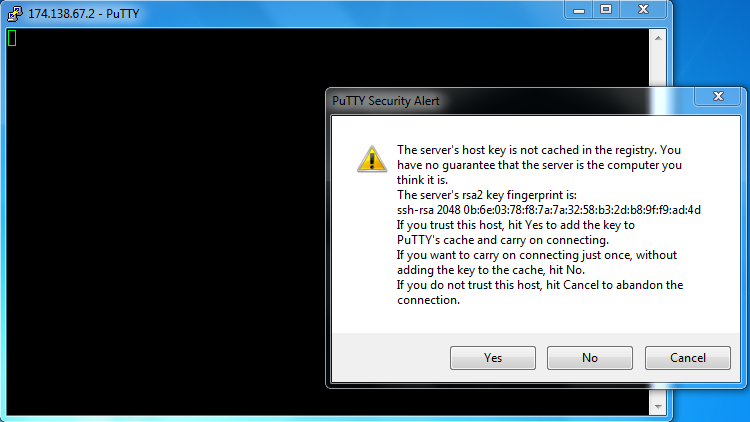
Click Open. You will see a security alert notifying that you have not connected to this server before. If you are sure that you have got the IP address right, click Yes.
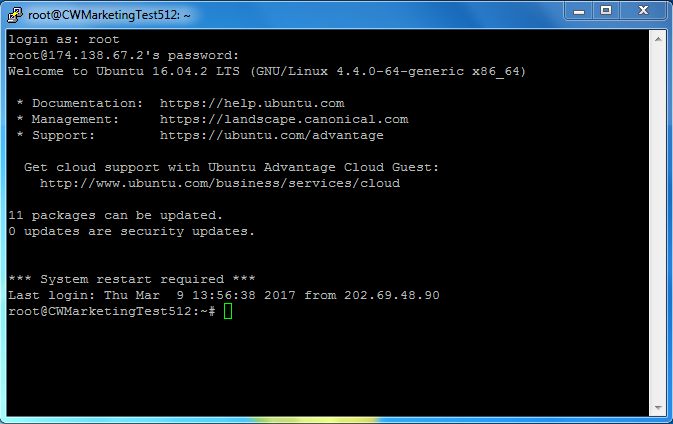
Next, insert the login credentials (username and password)) for the server.
Note: You will not be able to see the password in the console screen.
Now that you have inputted your username and password, you should be successfully connected to the server.
Introduction to the LAMP Stack
A LAMP stack is an integrated and interconnected setup of open source software. The setup comprises of Linux, Apache web server, MySQL which is an open source RDBMS and PHP.
LAMP stack is perhaps the most common solution for setting up servers for web development. An important reason for this universal choice is the cost factor - all components of the LAMP stack are free to use. In addition, the communities behind individual components are very active and patches and updates are frequently released to ensure that everything is in top working order.
Check Updates for Packages
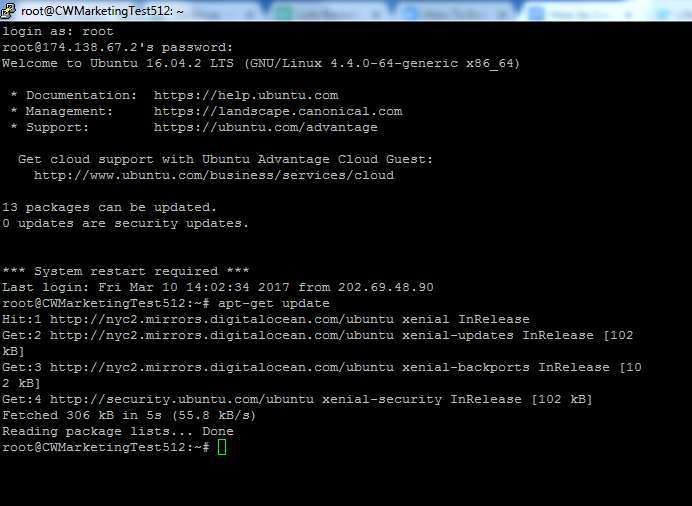
Before going ahead with the LAMP stack installation, update all the packages available on the server. In order to do that, use the following command:
$ apt-get update
$ apt-get upgrade
$ apt-get dist-upgrade
This is an important step because the latest version of all the packages ensure that the rest of the process and the subsequent Laravel development process goes without a hitch.
Let’s start with deploying the LAMP stack! We begin with installing the Apache web server.
Install the Apache Web Server
Apache is an open source web server that hosts approximately 50% of the websites on the internet. To install Apache server on the DO cloud server, use the following command:
`$ apt-get install apache2`During the installation process, you might be asked about the requirement for additional disk space. Press Y and Apache installation process will resume.
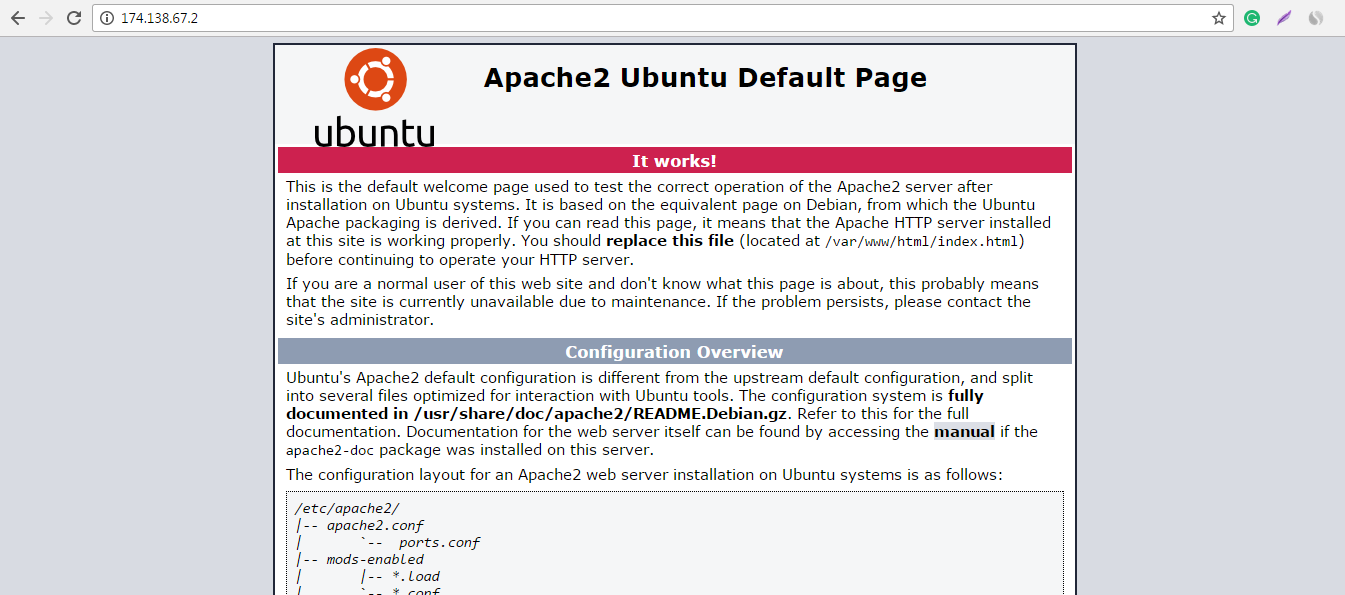
Once the installation is over, launch your browser and enter the server’s IP address in the address bar. In the case of successful installation, you should see the following page:
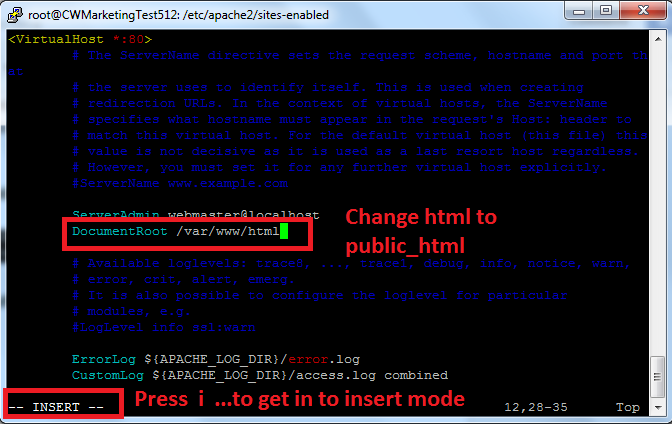
By default, Apache is configured to run server script located in the /var/www/html folder. To change this behavior and ensure that the server executes scripts from public_html folder. I will configure the 000-default.conf file (located in the apache2/sites-enabled folder. Use the following command to navigate to this folder:
`$ cd /etc/apache2/sites-enabled`Now to open up the config file in Vim, use the following command:
`$ vim 000-default.conf`Locate the entry for DocumentRoot, press i to edit the file, and then replace html with public_html. Check the screenshot below:
When done, press Esc and then press :wq to save and exit the editor. Next, rename the /var/www/html folder to public_html. For this, use the following set of commands:
`$ cd /var/www`
`$ mv html public_html`
`$ ls`
Now, that I have a working public_html folder, restart the web server services with the following command:
`$ service apache2 restart`To try out the new settings, re-enter the IP address in the browser. You should see the Welcome Page of the Apache server. Your Apache server is up and running!
Install MySQL DBMS
Now let’s install the MySQL which is a popular relational database management system that usually powers PHP applications.
To install MySQL on the cloud server, go to the root folder and initiate the installation process by entering the following commands:
`$ cd`
`$ apt-get install mysql-server`
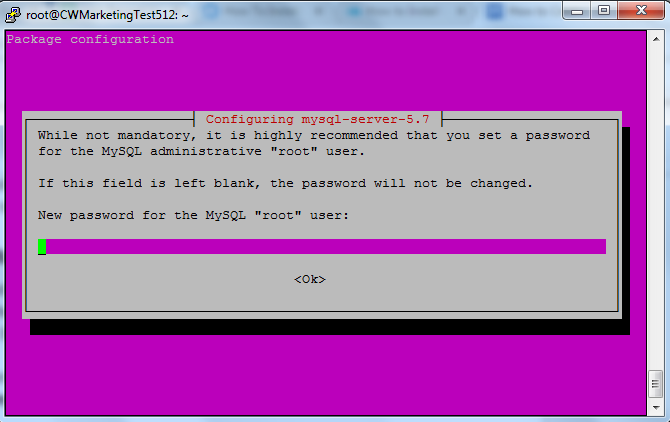
The process will pause to ask your permission. Type Y and press enter. In the next window, set the password of MySQL root user.
The process finishes in a matter of moments. Next, I will configure MySQL according to the requirements of the LAMP stack. Enter the following command:
`$ mysql_secure_installation`The command will ask you to enter the password for the root.
Note: You will not be able to see the password when you enter it.
Next, set the following configurations:
- Press Y to to setup Validate Password plugin.
- Select the level of password validation policy. (I selected the lowest for the * purpose of this tutorial).
- Enter N in order not to change the root password and hit Enter, then type Y to remove anonymous users and hit Enter.
- Type N if you want to disallow root login remotely and hit Enter.
- Now type Y to remove test tables and databases and hit Enter, and then type Y again and hit Enter.
When you are done with these steps, you should see All done! on the screen. MySQL database management system is now successfully installed and configured.
Install PHP
Now we go about installing PHP. Short for Hypertext Preprocessor, PHP is an open source web scripting language that is ideal for creating dynamic websites. To Install the latest version of PHP on your server, type the following command:
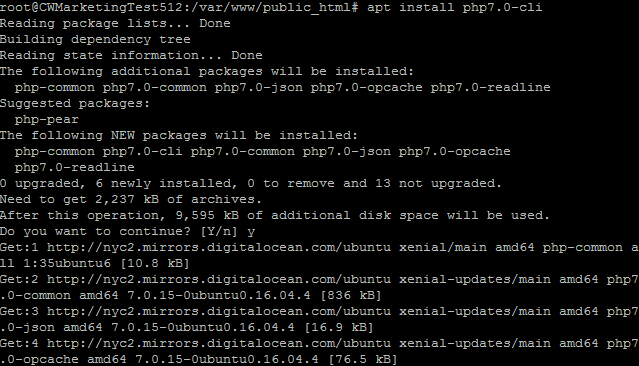
`$ apt install php7.0-cli`This command will install PHP on the server. In the beginning of the process, you might be asked whether you want to continue? Press Y.
Once the installation finishes, install the lib_apache2 mod for PHP. Next, restart the Apache service. Use the following commands for these two tasks:
`$ apt install libapache2-mod-php7.0`
`$ service apache2 restart`
Go to the public_html folder and create a simple PHPinfo file. Use the following commands:
`$ cd `
`$ cd /var/www/public_html`
`$ rm index.html`
`$ vim index.php`
Now, press I and type in the following code:
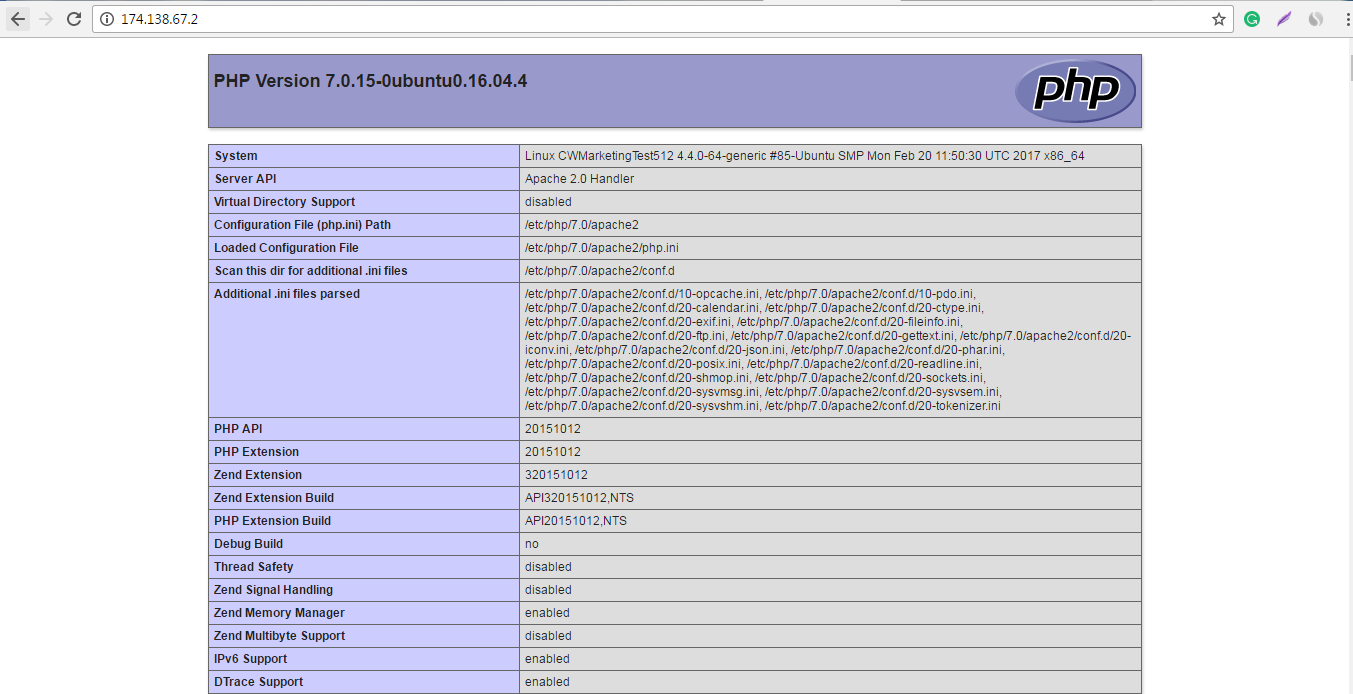
`<?php echo phpinfo(); ?>`Save it by pressing Esc and type :wq to save and exit. Now test this file by entering the server IP Address in the browser’s address bar. You should see something like this:
At this point, the LAMP stack has been successfully installed on the DO cloud server. However, there is still some work left to do.
Install PHPmyAdmin
Developers require a UI to manage MySQL. PHPmyAdmin is one of the most popular open source GUI for MySQL. To setup PHPmyAdmin on the server, execute the following commands:
`$ apt-get install php7.0-mbstring`
`$ apt-get install mcrypt `
`$ service apache2 restart`
`$ apt-get install phpmyadmin`
The process will ask you to select the server for installation. Select Apache and press Enter. Next, provide your MySQL credentials. PHPMyAdmin will be installed at /usr/share/phpmyadmin.
Next, I will create the relevant symlink inside the public_html folder. Type the following commands to go to the public_html folder and create the symlink:
`$ cd `
`$ cd /var/www/public_html`
`$ ln -s /usr/share/phpmyadmin`
`$ ls`
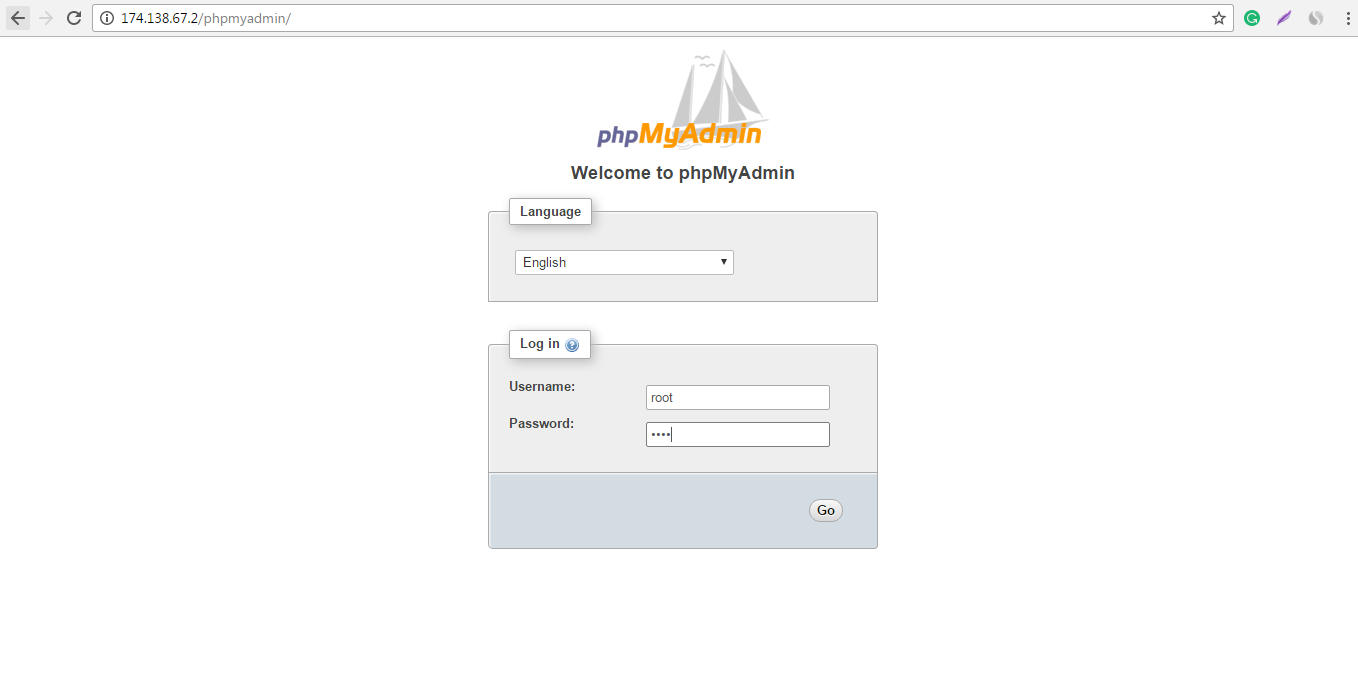
Now enter your_server_ip / phpmyadmin in the browser. You will see PHPmyAdmin’s login form:
Now, I will secure it by creating a .htaccess file using Vim inside PHPMyAdmin folder. This security measure will ensure that only allow your server’s IP communicates with PHPMyAdmin:
`$ cd phpmyadmin`
`$ vim .htaccess `
Press I and type in the following code:
`order allow,deny`
`allow from <your server ip>`
The LAMP stack is now ready for your Laravel project! But before you start working on your project, it is important to go about setting up some preliminary resources that you will need for your development project.
Install Git and Composer
Git and Composer are two essential resources for working with Laravel. Git is a free and open source distributed version control system designed to handle a host of projects. The Composer is a very useful tool to help manage dependencies in PHP. The Composer enables you to declare the libraries that your project is dependent on and it will manage them for you.
I will begin with the installation of git using a simple command:
`$ apt-get install git-all`This command is all you need to get the git going for your Laravel project.
Now I will install Composer and move it to the Bin folder so that I could use it on command line. Use the following commands for the process:
`$ php -r "copy('https://getcomposer.org/installer', 'composer-setup.php');"`
`$ php -r "if (hash_file('SHA384', 'composer-setup.php') === '669656bab3166a7aff8a7506b8cb2d1c292f042046c5a994c43155c0be6190fa0355160742ab2e1c88d40d5be660b410') { echo 'Installer verified'; } else { echo 'Installer corrupt'; unlink('composer-setup.php'); } echo PHP_EOL;"`

`$ php composer-setup.php`
`$ php -r "unlink('composer-setup.php');"`
`$ apt install composer`
Install Laravel Using Composer
Now to install Laravel, head to public_html folder and type the following command:
`$ cd `
`$ cd /var/www/public_hmtl`
`$ composer create-project --prefer-dist laravel/laravel myapplication`
`$ cd myapplication`
`$ chmod 777 -R storage/`
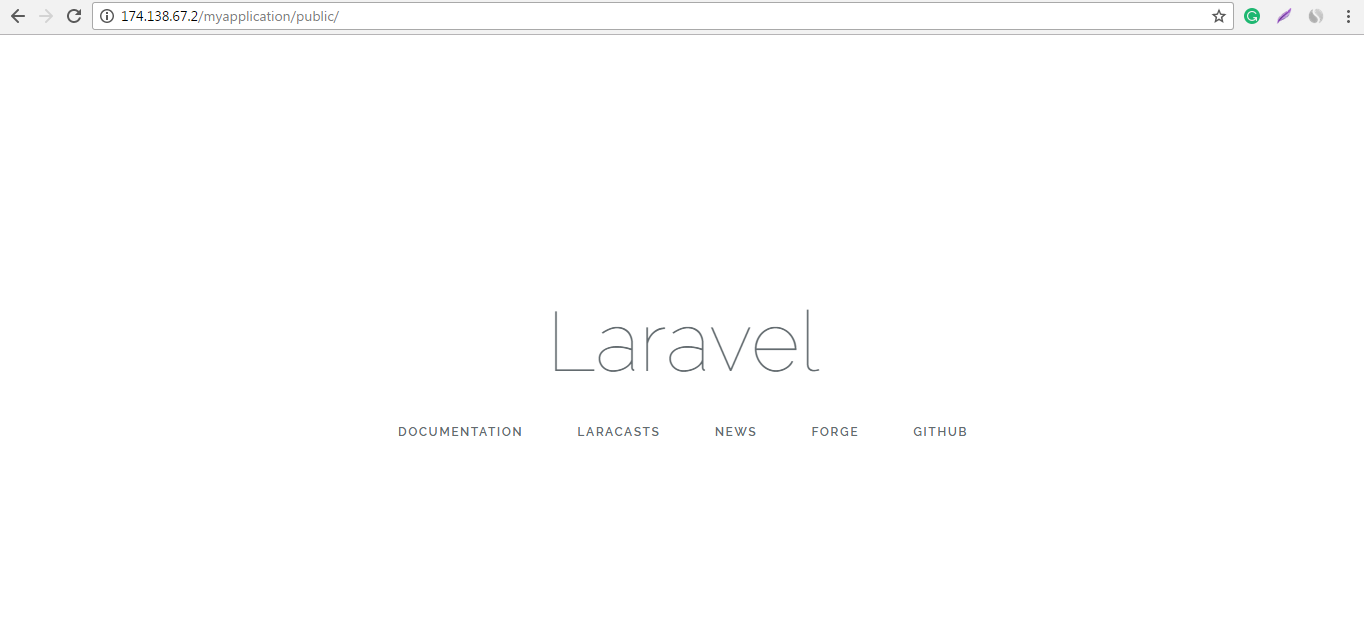
At this point, Laravel is installed and ready for use. To test the success of the installation, type your_server_Ip_address/myapplication/public in your browser. You will see the Laravel welcome page.
Deploying Laravel On Managed Hosting Platform
As you can see this is a perfectly legitimate but a long and tedious process of setting up a server directly on the cloud host. Not to mention the constant need of monitoring and maintaining your server! .
To experience high performing stacks, easy deployment process and hassle-free management and monitoring of your server and related resources, your best bet is signing up with a managed laravel hosting provider like Cloudways.
Cloudways has one of the best PHP stacks in the industry comprising of Nginx, Varnish, Apache, PHP-FPM, Memcached/Redis, MySQL, and full PHP 7 support. You can host your application to (Google,Amazon,Digital Ocean,Vultr and Kyup) in just few clicks.
There are also attractive discount offers and free credit. For example, using the coupon code: WPMUDEV gets you $50 credit for free!
Conclusion
In this tutorial, I introduced LAMP stack and then discussed the installation of the stack on DO cloud servers running Ubuntu. I next installed Laravel on the LAMP stack and then followed it up with mentioning a quicker alternative you can use to ready your Laravel environment using Cloudways.
Do note however, that LAMP stack is the most basic setup on any server that let's you run a PHP based website. But the industry has fast evolved to restrict LAMP stack as really a basic solution only. Other popular solutions use LEMP stack where Apache is replaced with the lightweight and powerful Nginx or a stack that utilizes Nginx and Apache together, with powerful caching technologies like Varnish cache etc.
This post is submitted by Saquib Rizwan
Link:
https://dev.to/rizwan_saquib/how-to-create-lamp-stack-with-laravel-on-digital-ocean-server
This post is submitted by our members. Submit a new post.
Tags: Tutorials Laravel 5 Laravel 5.1 Beginner Laravel 5.3 Laravel 5.2 Laravel 5.5 Laravel 5.4 v4.x v4.1 v4.2

