Create A User Authentication System with Facebook and Laravel Socialite
Note: This is Recipe 4 of our Laravel 5 Cookbook
What will we learn?
We will learn how to use Socialite - a new Laravel 5 feature - to let users log in using their Facebook account.
After learning this recipe, you may apply the technique to authenticate users with other social networks (Twitter, Github, Gmail, etc.) as well.
Installing Socialite
In most web frameworks, authenticating users using 3rd party providers is never as easy as it could be. Luckily, Laravel 5 provides a simple way to authenticate with OAuth providers using Socialite.
Currently, Socialite officially supports authentication with Facebook, GitHub, Google, Twitter and Bitbucket. If you want to use Socialite with other providers (Youtube, Wordpress, etc.), check out SocialiteProviders, which is a collection of OAuth 1 and 2 packages that extends Socialite.
Actually, Socialite is an official package, and it's not included in Laravel by default. To use Socialite, we have to install it by running this command:
composer require laravel/socialiteAlternatively, you may edit the composer.json file, add below code into the require section and run composer update:
"laravel/socialite": "~2.0"Next, open config/app.php.
Add the following line into the providers array:
Laravel\Socialite\SocialiteServiceProvider::class,Add the Socialite facade into the aliases array:
'Socialite' => Laravel\Socialite\Facades\Socialite::class,Done! Socialte is now ready to use!
Create a Facebook app
In order to use Facebook as our authentication provider, we must create a Facebook app.
Don't worry, it's very simple.
First, let's go to:
https://developers.facebook.com
Register a Facebook account or login if you have one already.
There is an Account Menu at the top right corner of the page.
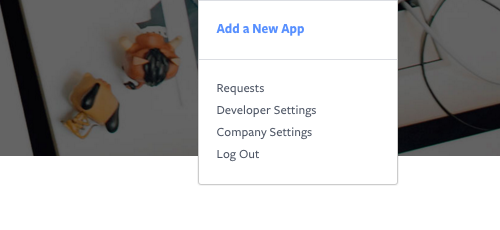
Click Add a New App and choose Website to create a Facebook app.
Alternatively, you can access this link:
https://developers.facebook.com/quickstarts/?platform=web
Enter your app's name and click Create New Facebook App ID:
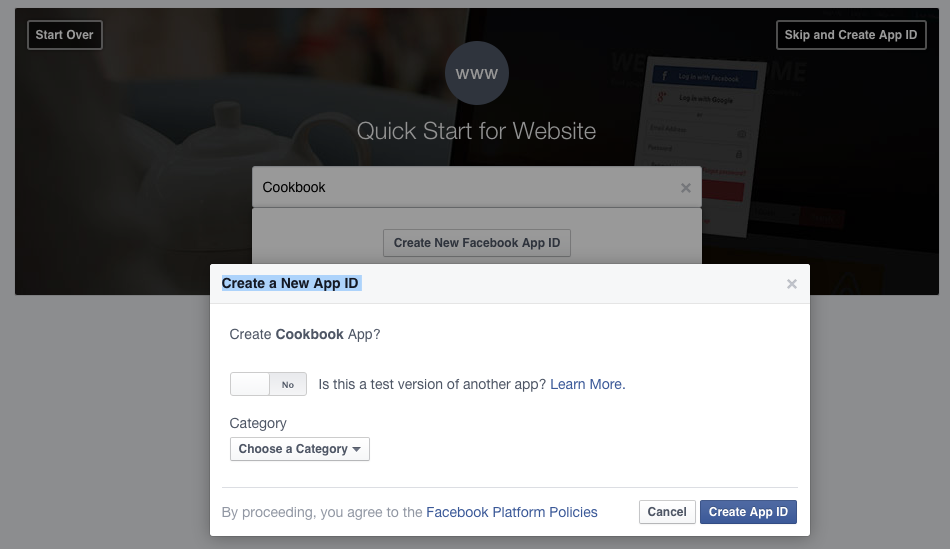
Choose a Category for your app and then click Create App ID
Click Skip Quick Start to access your App Dashboard
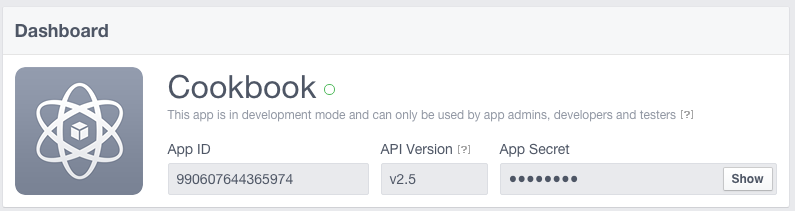
That's it! You can get your App ID and App Secret here.
Create a Facebook Test App
If you're working on Homestead, you will have to create a Test App to test the authentication locally.
Find the Test Apps button, which is on the left menu:
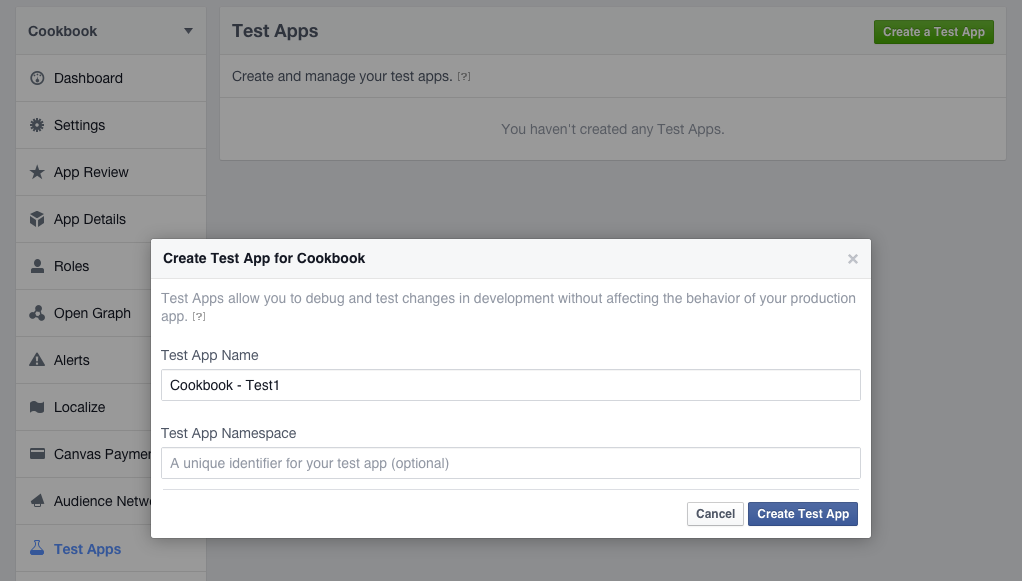
Follow the instructions to create a test app. You can name the app whatever you want.
After that, click Settings -> Add Platforms -> Website
Enter your app URL into the Site URL field. (For example, cookbook.app)
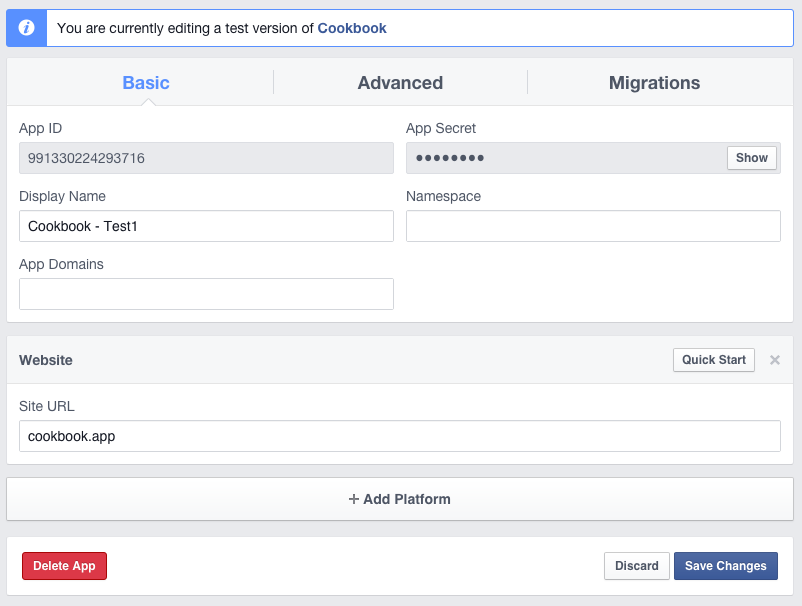
Enter your app URL into the App Domains field, too.
Click Save Changes to update your Test App.
Well done! Don't forget to grab your Test App ID and Test App Secret.
Tell Laravel about your Facebook app
After creating your Facebook app, you can connect it to your Laravel app by simply editing the config/services.php file. Add this:
'facebook' => [
    'client_id' => 'yourFacebookAppID',
    'client_secret' => 'yourFacebookAppSecret',
    'redirect' => 'http://yourLaravelAppURL/login/facebook/callback',
],
If you're using the .env config file, you may use the following instead:
'facebook' => [
    'client_id' => 'FACEBOOK_ID',
    'client_secret' => 'FACEBOOK_SECRET',
    'redirect' => 'FACEBOOK_URL',
],
Edit your .env files:
FACEBOOK_ID=yourFacebookAppID
FACEBOOK_SECRET=yourFacebookAppSecret
FACEBOOK_URL=http://yourLaravelAppURL/login/facebook/callback
Done! Laravel automatically detects your Facebook app information and prepares everything for you!
Note: If you're using Homestead, use your Test App ID and Secret.
Update Users Migration
We have to update our database to store users' Facebook Unique ID and other related information.
Read more at:
http://learninglaravel.net/books/laravelcookbook/backend-recipes
This post is submitted by our members. Submit a new post.
Tags: Tutorials Laravel 5 Laravel 5.1 Laravel 5.2 Intermediate